Feeds:
Posts
Comments

Posts Tagged ‘asian recipe’

I love soups, but I have never been a fan of miso soup.

Especially the way they make them in your typical American Japanese restaurants — the soup just tastes “dead” to me — the saltiness of the miso is the only thing that comes through. Bleh. The beauty of soups is their layers, their whole-heartedness, or on the other end of the spectrum, the soothing beauty of its clarity — your typical restaurant miso soup sat on neither ends.

But I always knew that miso soup could shine — I love the home-style, hearty miso soup they serve at Katsu Hama in New York City — filled with julienned cabbage, carrots and onions.  The sweetness of the vegetables flavor the miso soup and add another dimension of flavor (and not to mention texture).  I also, absolutely adore, the clam-based miso soup Thomas serves at Taki Sushi.

About two weeks ago I made a successful pot of miso soup at home — and have been craving miso ever since.  The key, really, I have found (finally confirmed what all the other food blogs and chinese mom-cooks have told me), is to mix the miso into a paste before adding them to the soup, and NEVER boil the miso to maintain its fermented, sweet flavor.  I forgot to take pictures, but here’s your basic vegetable miso soup recipe:

Home-style vegetable-based miso soup

Ingredients

  • shiro miso paste /white miso paste (obviously, you can use red)
  • 1 onion, julienned
  • 1-2 carrots, julienned
  • 1-2 daikon, julienned (feel free to substitute and change the vegs)
  • touch of soy sauce
  • salt
  • cilantro
  • water or stock
  1. sweat your vegetables in a med size sauce pan.
  2. add in water (or stock if you want), bring to a boil them simmer until veg are tender.
  3. in a small bowl, add in a table spoon of the simmering liquid from the pan, mix in miso and soy sauce to form a paste
  4. dump the miso-soy paste into the soup, stir and remove from heat.
  5. add salt, cilantro for garnish.

More miso recipes to come — I am sure….already thinking miso marinated fish, miso pork, miso steamed tofu….miso sweet parsnip puree (yeah fall)?

Read Full Post »

Towards the end of 2008 I got a really awesome gift from my sister and brother-in-law Peggy and Terry.  It is a Fagor 3-in-1 Electric Multi-Cooker: an all-in-one pressure-cooker, slow-cooker, and rice-cooker.  I had been going back and forth over the benefits of owning a pressure cooker vs. slower cooker for the longest time and a multi-cooker seemd to be the perfect solution.  The Fagor multi-cooker had gotten some fairly good reviews on Amazon.com.  The only downside is that unlike stand-alone pressure cookers that can get pressure as high as 15 psi the Fagor pressure-cooking function only has 2 psi settings:  High (9 psi) and Low (5 psi).  What that essentially means (from my info digging on the web) is that it will not save as much time as the 15 psi and you need to adjust your cooking time accordingly.  At 9 psi, the Foger multi-cooker claims to cut down 70% of the cooking time from conventional stove-top cooking, but if you are working with a pressure cooker recipe (which is typically written to a 15 psi setting), then for your own planning purpose, you need to add about 40% to the estimated time stated on the recipe.  Finally, keep in mind that it takes about 20-30 minutes for the pressure cooker to build up enough pressure in the first place.

Anyway, the piece of appliance sat in the corner of my apartment while I freaked out about finals and then I put it to good use.  The first test? Taiwanese Beef Noodles 2-way.  I made a tomato-based beef noodle soup (蕃茄牛肉麵) with the pressure cooker function at high (9 psi) and it took an hour (1.5 hour total including prep time).  I also made a soy-based or braised beef noodle soup version  (紅燒牛肉麵) with the slow-cooker function — in that case I prepped all the materials and had it on overnight.

The tomato-based noodle soup was not as much of a success.  It turned out more like my mom’s tomato beef noodle soup, which was not what I was going for, but here’s a photo of it:

taiwanese tomato beef noodle soup

taiwanese tomato beef noodle soup

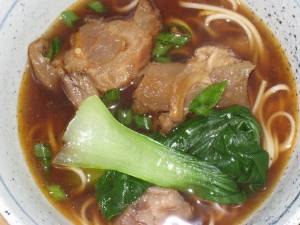
The braised /soy-sauced beef noodle soup, on the other hand, I liked alot.

taiwanese braised beef noodle soup

taiwanese braised beef noodle soup

I am trying to locate the sheet of paper that I took notes on re recipe. Will update when located, in the meantime here’s the base recipe I worked off of.

The multi cooker worked miraculously and the beef tendons cooked down til they are soft and gooey, which made the soup thicker too probably due to the gelatin in the beef tendon (in the process of reading Harold McGee’s On Food and Cooking).

Read Full Post »

I cooked frozen dumplings in the microwave tonight for dinner.  A lot of people get really grossed out when I tell them I do this. Yes, you can cook Chinese frozen dumplings (NOT the gyoza they sell in Japanese supermarkets that are fully cooked already), but the frozen, raw dumplings…in your average microwave. It is really fast! and easy! And yes, they still come out better when boiled in hot water, but it is a good solution when you’ve used up all your pots, or when you want dinner in a hurry.

I got the recipe from a Taiwanese cook book 用微波爐作菜 or Cooking the Microwave Way.

Steps:

  1. Put frozen dumplings in a bowl.
  2. Fill the bowl with hot water so that they at least half an inch over the dumplings. (By hot water, I mean water with your faucet turned to hottest possible).
  3. Cover the bowl and microwave on high for 3-4 minutes for about 6-7 dumplings. (The original recipe calls for 6 min. on high for 15 dumplings).
  4. You know the dumplings are ready when they are floating in the water.
  5. Serve with seasoning of your choice.

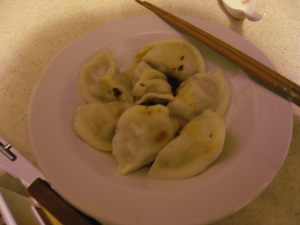
Here is a photo of my dinner tonight:

frozen dumplings cooked in microwave

frozen dumplings cooked in microwave

Read Full Post »

I made 牛肉餡餅for the second time today, but I messed up somehow. But I suppose I should be equally honest of my success and failure…so I decided to blog about it anyway.

牛肉餡餅, which I’ve translated into Chinese pan-fried beef bun/beef pancake…is basically a round, flattened calzone with beef filling….it kind of looks like a pancake…I guess. If anyone knows the actual name of these in English please do let me know, or if you think you’ve got a better translated name for it.

Many of you know that I am a huge fan of Eupho Cafe, and that is where I got the recipe from. I also got a nice pictorial guide from Meli’s blog.  Both contain tons of wonderful recipes…and come with my highest recommendation.

You can find the recipe at both blogs, but here is what I used or I guess the recipe substantially reproduced in English:

For the dough:

bread flour 150 g
cake flour 150 g
dry yeast 1 tsp
water 170 g (equivalent of 170 cc)

For the beef filling:

ground beef 360 g
green scallions 50 g
salt 4 g
soy sauce 5 g
sugar 3 g
pepper 2 g
1 egg white

  1. Mix together all the ingredients for the beef filling. Set aside.
  2. Mix the dry yeast with water.
  3. Mix the rest of the ingredients for the dough. Add the yeast with water, mix. Knead until the surface of the dough is shiny.  Then return dough to the bowl and cover with wet towel for 15-20 minutes.
  4. Divide the dough into 12 balls (the original recipe is for 16).
  5. lightly flour your work surface. roll the dough balls into flat, round sheets, making sure the edges are thicker than the center
  6. Portion the beef filling into equal amounts (12).
  7. Fill the beef filling. Then fold in the dough and flatten it lightly with your palm.
  8. to cook: pan-fried them over medium fire on both sides until sides are golden brown.

The original recipe can be found here.

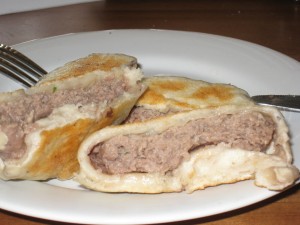
I think the reason for my failure this time is 1) I was not careful with the measurement of the flour; 2) I got lazy/impatient about rolling out the dough and so they were quite uneven (as you can see from the photo with the view of them cut-open. Patience truly is a virtue.

I also think, and I need to keep playing with this, that based on my personal taste preferences I need to use more soy sauce and perhaps more salt for the meat filling. Some finely grated ginger may also help brighten the flavor. Things to remind myself of the next time I make this (whenever that may be).

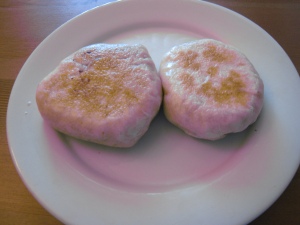
So here it is, my not so pretty 牛肉餡餅:

pan-fried beef bun 牛肉餡餅

pan-fried beef bun 牛肉餡餅

cut open 牛肉餡餅

cut open 牛肉餡餅

I still ate two though. Super stuffed and feeling fat =P

Read Full Post »